
Sanding 100-Year-Old Floorboards: Risks and Best Practices
There is something special about floorboards that have witnessed a century of life. They have held generations of footsteps, survived wars and weather, and aged into a warm, irreplaceable character. But sanding such old timber is not the same as refreshing a floor installed twenty years ago. These boards are fragile, often thin, and full of history. One wrong pass with a drum sander, and a century of character can be lost forever. This article explores the risks of sanding very old floorboards and the best practices professionals use to restore them safely.
Why 100-Year-Old Boards Are Different
Age changes wood. Over a century, old floorboards have dried completely, becoming more brittle than modern timber. They have expanded and contracted thousands of times, loosening joints and creating subtle movements. They have been walked on, covered, uncovered, and sometimes abused. A board that looks solid may be paper-thin in places from previous sandings.
Century-old boards are typically softwood—pine or deal—which is already softer than modern hardwoods. Add a hundred years of drying, and the wood becomes even more delicate. It splinters easily. It cracks under pressure. It compresses rather than sands cleanly.
Understanding these characteristics is the first step toward sanding old floors without destroying them.
The Major Risks

Over-Sanding
The most common and serious risk is removing too much material. Each sanding takes a layer of wood. If previous owners have already sanded the floor two or three times, the boards may be dangerously thin. The tongue-and-groove joints may sit just millimeters below the surface. Sand too deep, and the tongue becomes exposed or breaks off entirely. Once the tongue is gone, boards loosen and the floor loses structural integrity.
Splintering and Cracking
Old wood is brittle. The vibration from sanding equipment can cause cracks to appear or existing hairline fractures to spread. Board ends, especially near fireplaces or doorways, are particularly vulnerable. A sander catching on a raised board edge can splinter it badly.
Raised Nail Heads
Over decades, nails work their way upward. A hundred-year-old floor is full of nail heads that sit flush or slightly proud of the surface. Sanding over these ruins sandpaper, creates sparks, and can tear chunks from the sanding belt. Worse, the heat from friction can scorch surrounding wood.
Hidden Damage
Old floors hide secrets. Rot may have developed around old leaks. Woodworm holes may be more numerous than visible on the surface. Previous repairs may have used different wood types that sand at different rates. These hidden issues only reveal themselves during sanding, often too late.
Loss of Character
Not all risks are structural. Some are aesthetic. Over-sanding removes the patina that gives old floors their warmth. The worn edges, the subtle dips, the darkening around old nail holes—these are features, not flaws. Aggressive sanding can erase them entirely, leaving a floor that looks new but feels wrong.
Best Practices for Sanding Old Boards
Assessment First
Before any sanding begins, a thorough assessment is essential. Professionals measure the board thickness above the tongue using a moisture meter or by checking at heating vents or floor registers. They identify loose boards, protruding nails, and areas of suspected rot. They determine how much material can safely be removed.
If the floor is already too thin, sanding may not be an option at all. A screen and recoat (light abrasion and fresh finish) might be the only safe choice.
Nail Punching
Every nail head must be punched below the surface. On a hundred-year-old floor, this means hundreds or thousands of nails. The work is tedious but non-negotiable. Each nail is set using a nail punch and hammer, then the small hole is filled later.
Never sand over nails. The damage to equipment and the floor is not worth the time saved.
Start with Finer Grits
Modern floors are often sanded starting with 24 or 36 grit paper. Old floors demand a gentler start. Professionals begin with 50 or even 60 grit, removing old finish slowly and carefully. They progress through the grits more gradually, using each one to remove only the scratches left by the previous grit.
The goal is not speed. The goal is control.

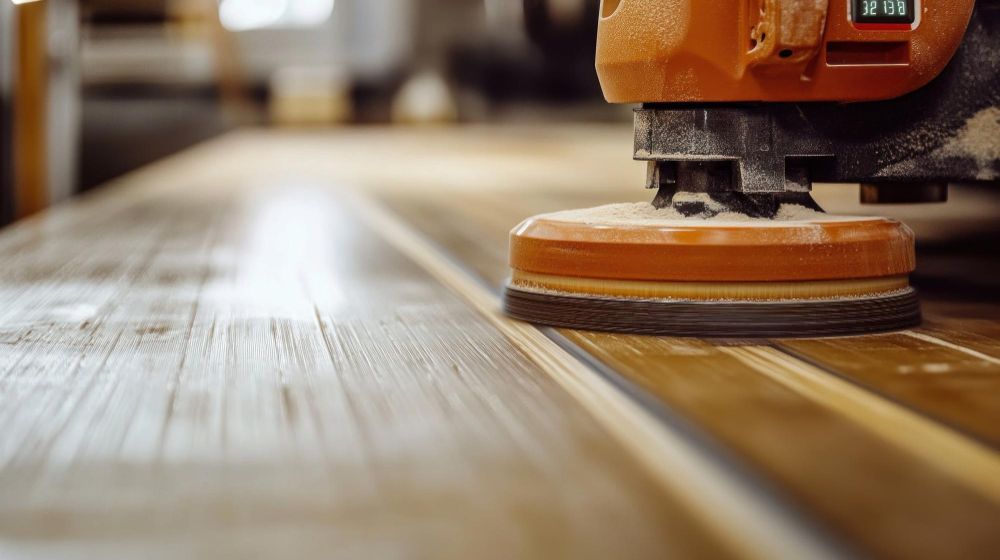
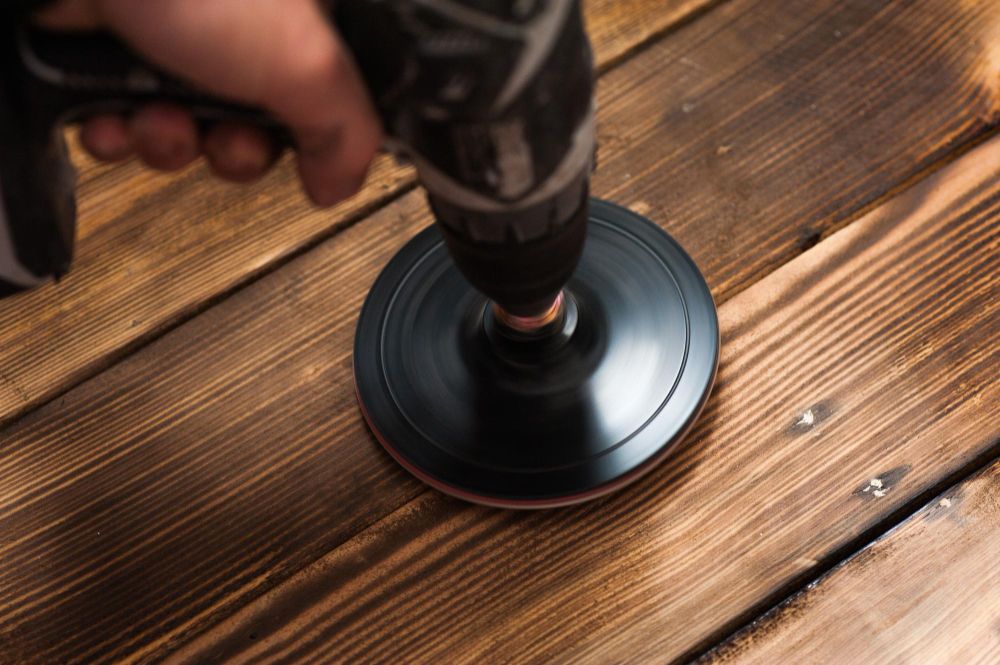
Use Lighter Equipment
Heavy drum sanders can be too aggressive for old floors. Many specialists switch to belt sanders or orbital machines that remove material more slowly and offer better control. These lighter machines are less likely to dig in or catch on uneven boards.
For the final passes, multi-disc buffers with fine screens produce a smooth surface without aggressive cutting.
Wet the Grain
Old softwood has pronounced grain that raises during sanding and again when finish is applied. Professionals often mist the floor lightly with water between sanding passes. This intentionally raises the grain, which is then cut off with a final light sanding. The result is a smoother surface that stays smooth after finishing.
Fill Gaps Carefully
Gaps between old boards are part of the character. Filling them is optional. If filling is desired, professionals use flexible resin fillers that move with seasonal expansion. Rigid fillers crack within months. For the largest gaps, timber strips inserted into the space create a seamless, permanent repair.
Choose the Right Finish
Old floors were traditionally finished with wax or hard wax oil. These finishes penetrate the wood rather than sitting on top. They allow the floor to breathe and maintain a natural appearance. Modern polyurethane lacquers can be used but may look too plastic on a century-old floor.
Hard wax oils are often the best choice. They provide durability, allow spot repairs, and preserve the warm, matte appearance that suits old timber.
When Not to Sand
Some old floors should not be sanded. Signs that sanding is unsafe include:
- Boards visibly thin with tongues visible at edges
- Extensive rot or woodworm damage
- Multiple previous sandings evident (check at heating vents)
- Wide cracks and large missing sections
- Significant structural movement in the subfloor
In these cases, replacement of damaged sections or full floor replacement may be the only options. Sometimes, leaving the floor as-is and covering it respectfully is better than attempting a destructive restoration.
The Value of Professional Expertise
Sanding hundred-year-old floorboards is not a DIY project. The margin for error is tiny. A mistake made in five minutes can destroy character that took a century to develop. Professionals who specialise in period floors understand the risks and have the techniques to avoid them.
They also know when to stop. Knowing that a floor is too thin for sanding is as valuable as knowing how to sand it properly.
Preserving History
Old floorboards are not just wood. They are history. The slight dip near the fireplace marks where generations stood to warm themselves. The dark stain near the window comes from a plant watered by someone long gone. The scratches near the door tell of furniture moved in and out over decades.
The goal of sanding should not be perfection. It should be preservation with improvement. Remove the grime and old finish. Smooth the surface gently. Protect the wood with an appropriate finish. But leave the character. Leave the story.
A hundred-year-old floor properly restored will last another hundred years. Sanded badly, it will last only as long as it takes for the damage to show. Choose carefully. Work gently. Respect the age.