
Restoring Original Floorboards in Victorian Homes: A Step-by-Step Guide
Victorian homes, built during the reign of Queen Victoria (1837-1901), are treasured for their character, craftsmanship, and enduring beauty. Among their most prized features are the original wooden floorboards, silent witnesses to over a century of life. Yet, time, neglect, and layers of paint or carpet often leave these floors hidden and forgotten. Restoring them is not just a home improvement project; it's an archaeological dig that breathes new life into the very soul of your property. This guide will walk you through the journey of uncovering and revitalizing these historic treasures.
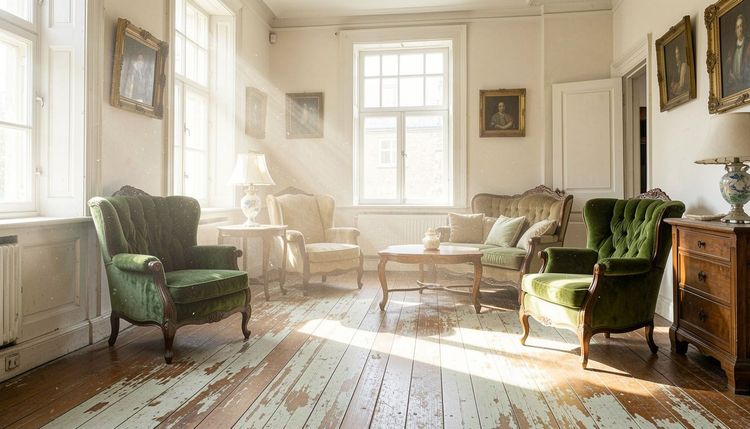
The Unique Character of Victorian Floorboards
Before the first tool is lifted, it's crucial to understand what makes these floors special. Unlike modern, uniformly engineered planks, Victorian floorboards are full of personality and tell a story of the era's industrial advancements.
- Timber Types: The most common woods were locally sourced and durable. Pitch Pine was widely used for its resilience and rich, resinous grain. Douglas Fir was another favorite, known for its long, straight planks and distinctive, often dramatic, grain patterns. In more affluent homes, one might find exotic hardwoods like Mahogany or Oak.
- Board Dimensions: Victorian floorboards are typically long and wide, often ranging from 6 to 10 inches in width. They were cut from the heart of the tree, resulting in stable, substantial planks that are a rarity today.
- Surface Character: These floors were designed to be working surfaces, often covered with rugs. They were not always perfectly smooth or sanded to a high-gloss finish. It's common to find saw marks, minor gaps, and a charming, uneven texture that adds to their authenticity. Preserving this "patina" is key to an authentic restoration.
A Step-by-Step Guide to Restoration
Restoring a Victorian floor is a meticulous process that rewards patience. Rushing can lead to irreversible damage.
Step 1: Investigation and Assessment
The first step is detective work.
- Locate a Test Area: Find an inconspicuous spot, often near a hearth or in a closet, and carefully pull up a corner of the carpet or linoleum.
- Inspect the Boards: Check for the wood type, the extent of damage, the thickness of the boards, and the number of layers of old finish or paint. This will determine the feasibility and scope of the project.
- Identify Hazards: Be aware that old layers of paint, especially in pre-1940s homes, may contain lead. A lead test kit is an essential first purchase.
Step 2: The Great Uncovering
This is the most dramatic phase.
- Remove Coverings: Carefully pull up carpets, underlay, and tack strips.
- Address Old Floor Coverings: Linoleum or vinyl tiles may be glued down. Their removal can be labor-intensive. Furthermore, the adhesive may contain asbestos. If you suspect this, do not proceed and consult an asbestos abatement professional.
- Number the Boards: As you remove the boards (necessary for repairs underneath), meticulously number their ends and create a layout map. This ensures they can be relayed in their exact original positions.
Step 3: The "Big Clean" and Initial Repair
- Debris Removal: Pull out all old nails, staples, and tack strips.
- Deep Cleaning: Use a scraper to remove the bulk of old adhesive and dirt, followed by a thorough vacuuming.
- Board Repair: This is where you decide the floor's fate.
- Staining & Gaps: Small cracks are part of the charm and can be left as is. For larger gaps (over 5-6mm), traditionalists may use slivers of matching wood glued in place, rather than modern wood filler, for a more authentic and durable repair.
- Damaged Boards: Severely damaged, rotten, or insect-infested boards must be replaced. Source reclaimed timber from a salvage yard for the best aesthetic match. New wood will look glaringly out of place.
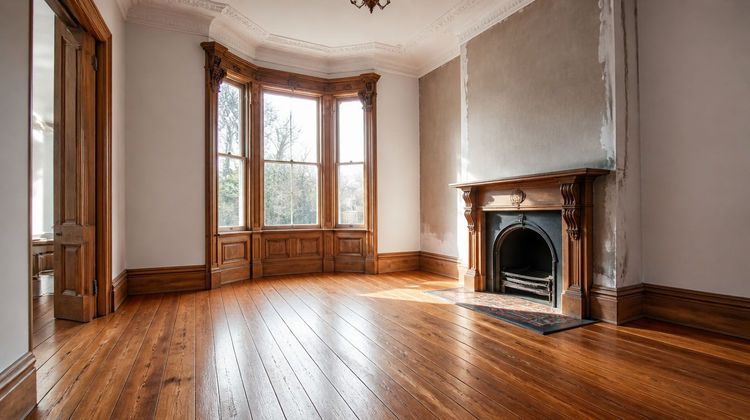
Step 4: Sanding - The Art of Revelation
This is the most critical and demanding stage. Hiring a professional is highly recommended for Victorian floors.
- Equipment: Professionals will use a combination of a large drum or belt sander for the open areas, an edging sander for the perimeter, and a detail sander for corners.
- The Process: They will start with a coarse-grit paper (e.g., 40-grit) to remove the old finish and surface imperfections, progressing through medium (60-80 grit) and fine (100-120 grit) papers to achieve a smooth surface. The goal is to remove the minimum amount of wood necessary.
- Preserving Character: A skilled sander will know how to navigate saw marks and uneven surfaces without flattening the unique texture that gives the floor its age and character. They will avoid "over-sanding," which can make the floor look new and generic.
Step 5: Finishing - Protection and Beauty
The finish you choose will dramatically impact the final look and durability.
- Traditional Look: Hardwax-Oils: Products like Osmo Polyx-Oil or Rubio Monocoat are excellent modern choices. They penetrate the wood, enhancing its natural grain and providing a durable, matte, and "breathable" finish that feels like wood, not plastic. They are also easy to spot-repair.
- Durable & Classic: Lacquer/Varnish: Modern water-based lacquers are very durable, dry clear (avoiding the yellowing of old-style varnishes), and provide a protective layer on top of the wood. They are available in satin, matt, or gloss sheens.
- Historical Authenticity: Oil and Beeswax: For the purest historical approach, a blend of linseed oil and beeswax can be used. This creates a wonderfully deep, soft sheen but offers less durability and requires more frequent maintenance.
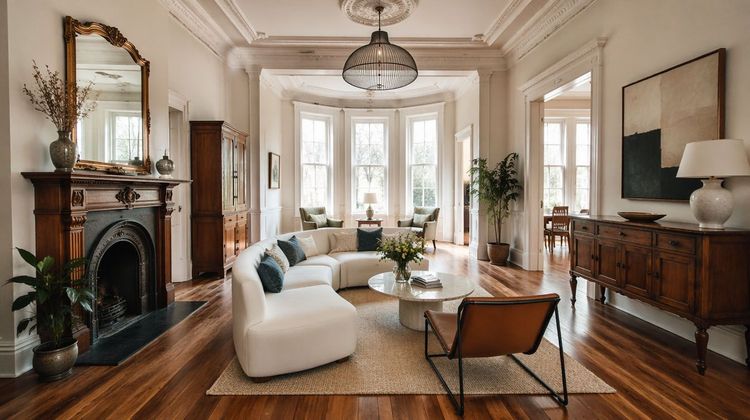
Why Go Through the Trouble? The Value of Restoration
Restoring your original Victorian floorboards is an investment with immense returns:
- Preserves Heritage: You are saving a piece of architectural history that cannot be replicated.
- Adds Value: Original, restored floors are a significant selling point and can dramatically increase the value of your property.
- Improves Air Quality: Removing old carpets eliminates a reservoir of dust, mites, and allergens.
- Unmatched Aesthetic: The warmth, character, and story told by original boards are something no modern reproduction can achieve.
Restoring a Victorian floor is a journey back in time. It requires respect for the craftsmanship of the past and a careful hand in the present. The result, however, is more than just a beautiful floor—it's the restored heartbeat of your historic home, ready to witness another century of memories.