Our blog

How to Restore Wooden Floors Between Tenancies in Hyde Park

A practical landlord checklist for restoring wooden floors between Hyde Park tenancies. Inspect, repair, sand and finish within the void period.

The period between tenancies is one of the most valuable windows for landlords and letting agents in Hyde Park. With students and renters moving in and out around the same dates each year, the void period is often short—sometimes just a few days to turn a property around. This limited window makes efficient planning essential, particularly when it comes to wooden floors. Restoring or refreshing a floor between tenancies not only improves the property's appearance but also protects your investment for the next tenant. This practical guide provides a step-by-step checklist for inspecting, repairing, sanding, and refinishing wooden floors during the gap between tenancies, helping you make the most of the available time.

Inspect the Floor Before Booking Other Trades

24567567.jpg

Before scheduling any work, conduct a thorough inspection of the floor. This should happen as soon as the previous tenant has vacated and the property is cleared. Early inspection allows you to plan the scope of work, book trades in the correct order, and avoid delays. In a busy rental market like Hyde Park, where void periods are often measured in days rather than weeks, having a clear picture of the floor's condition before any other trades are booked is essential. For landlords in Hyde Park and Woodhouse, where void periods are often tight, floor restoration for Leeds properties demands a proactive approach to avoid last-minute complications. Without this initial assessment, you risk discovering unexpected issues mid-way through the turnaround, which can push back move-in dates and create unnecessary stress for both you and the incoming tenant.

Look for:

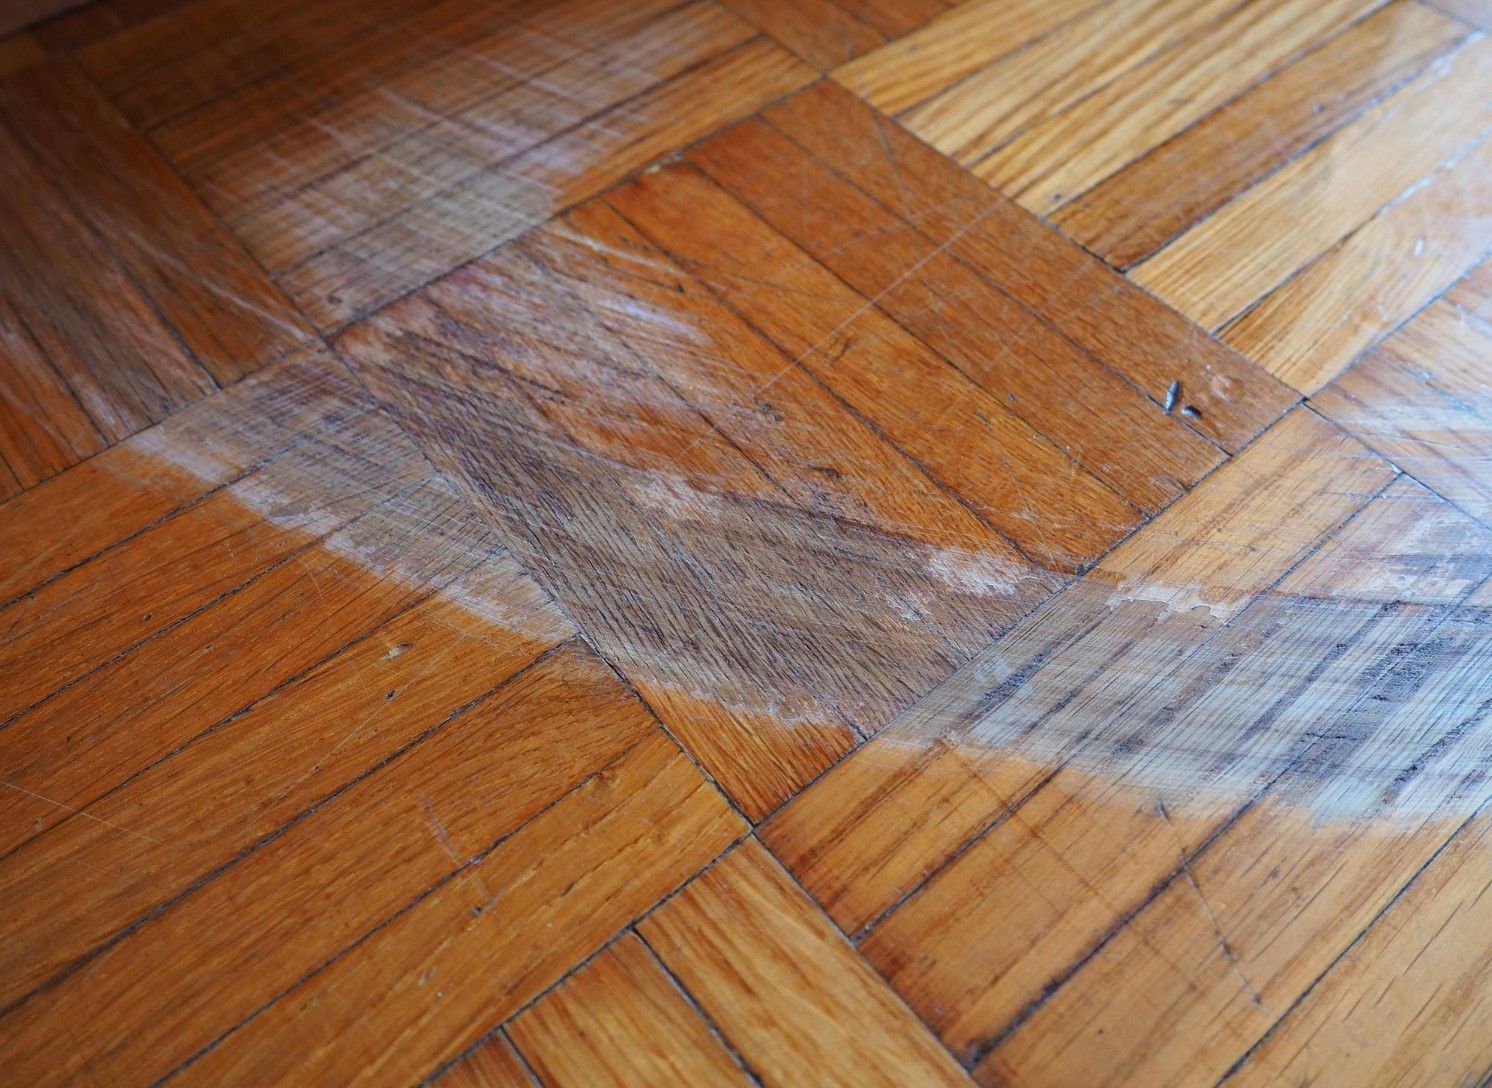
  • Scratches – surface marks or deeper gouges
  • Loose boards – movement underfoot
  • Water marks – stains from spills, leaks, or cleaning
  • Pet damage – scratching or staining
  • Missing blocks – gaps in parquet or board sections
  • Exposed nails – fixings that have risen above the surface
  • Carpet adhesive – residues from previous floor coverings
  • Movement – areas that feel unstable or springy
  • Moisture – damp patches or signs of water ingress
  • Condition beneath furniture – areas that may differ from exposed sections

Document everything with photographs. This inspection will determine the scope of work and help you prioritise repairs. A well-documented inspection also serves as a useful reference point for the floor restoration team, allowing them to provide an accurate quote and confirm whether the work can be completed within the available timeframe. It also helps you distinguish between wear that can be addressed quickly and issues that require more extensive intervention. With a thorough assessment in hand, you can proceed confidently, knowing exactly what needs to be done and when.

Decide What Level of Work Is Required

Not every floor needs a full sand and refinish between tenancies. Matching the scope of work to the floor's condition and the available time saves money and avoids unnecessary disruption.

Condition Recommended Work Time Required
Light surface wear Screen and recoat 1 day
Scratches and dull finish Sand and refinish 2-3 days
Damaged or loose boards Repair, then sand 3-4 days
Widespread damage or missing sections Full restoration 4-5 days
Lifted or damaged laminate Replacement (not sanding) 1-2 days

Screen and recoat is the fastest option, involving light abrasion of the existing finish followed by a fresh coat of lacquer or oil. Sand and refinish is more comprehensive, addressing scratches, stains, and unevenness. For floors with loose boards, missing sections, or rot, repairs must be completed before sanding begins. Laminate cannot be sanded and must be replaced if damaged.

Correct Order of Works Between Tenancies

245625479.jpg

To make the most of the void period, work must be scheduled in the correct sequence. The following order minimises delays and ensures each trade can work without disrupting the next:

  1. Tenant checkout and final inspection
  2. Leak and moisture inspection
  3. Removal of rubbish and loose furniture
  4. Dirty building work (plastering, painting, or structural repairs)
  5. Electrical and plumbing access (if boards need lifting)
  6. Floor repairs (loose boards, replacement sections, woodworm treatment)
  7. Floor sanding
  8. Staining and finishing
  9. Curing period (no foot traffic)
  10. Light decorating touch-ups (after floor finish is cured)
  11. Professional clean (careful around the new floor)
  12. Inventory photographs
  13. New tenant move-in

Scheduling sanding after other messy trades prevents dust and debris from settling on the new finish. Painting and decorating should be completed before sanding where possible, or limited to light touch-ups afterwards.

Repairs That Must Be Completed Before Sanding

Sanding over damaged or unstable boards will not fix the underlying problem. All structural and surface repairs must be completed before the sanding phase begins.

Loose Boards

Boards that move underfoot must be re-secured before any sanding takes place. This is typically done using screws rather than nails for a more permanent fix. The fixings are countersunk and filled so they remain invisible after finishing.

Exposed Fixings

Nails that have risen above the surface must be punched below the board using a nail punch and hammer. This prevents damage to sanding belts and ensures a smooth, even finish across the entire floor.

Missing Blocks

Where blocks are absent from parquet or board sections, replacement with matching reclaimed timber is essential. The new timber should match the original in species, width, thickness, and character to ensure a seamless blend.

Damaged Thresholds

Door thresholds and transition strips that are damaged or uneven should be repaired or replaced before sanding begins. This ensures a level surface and a professional finish where the floor meets other rooms.

Unstable Service Cuts

Boards that have been cut for plumbing or wiring access must be properly refitted before sanding. This may involve securing the cut section, inserting a new piece, or reinforcing the area to eliminate movement.

Active Moisture

If moisture is detected, the source must be identified and resolved before any restoration work proceeds. Sanding over a damp floor traps moisture beneath the new finish, leading to warping, finish failure, and long-term damage.

Rot or Insect Concerns

Timber affected by rot or woodworm must be treated or replaced before sanding begins. Active infestation requires professional treatment. Rotten sections should be cut out and replaced with sound timber to prevent further spread.

Choosing a Fast but Durable Finish

Between tenancies, time is often the limiting factor. However, not all finishes are suitable for a tight turnaround. Understanding the difference between dry to touch, light foot traffic, and fully cured helps you manage expectations.

Finish Dry to Touch Light Foot Traffic Fully Cured Suitable for Fast Turnaround?
Water-based lacquer 2-4 hours 8-12 hours 3-7 days Yes
Solvent-based lacquer 4-6 hours 12-24 hours 7-14 days No
Hard wax oil 6-12 hours 12-24 hours 3-5 days Yes (with oil)
Natural oil 8-12 hours 24-48 hours 7-14 days No

Water-based lacquer is the fastest option for landlords. It dries quickly, allows light foot traffic within hours, and cures fully within days. Hard wax oil offers a more natural appearance and dries quickly enough for most void periods, provided application is planned carefully. Solvent-based lacquers and natural oils have longer curing times and are generally not recommended for tight turnaround windows.

Always check manufacturer guidance for the specific product being used. Curing times vary by brand, temperature, and humidity.

Protecting the Restored Floor Before Move-In

Once the floor is finished, protection is essential to ensure it remains in pristine condition for the new tenant. The days between finishing and move-in are when most damage occurs. A fresh finish is only as good as the protection it provides. Proper protective wood floor sealing ensures the surface is resistant to scratches, moisture, and dirt, giving you confidence that the floor will survive the first few weeks of a new tenancy.

To avoid issues, establish clear ground rules for everyone entering the property. Furniture should always be lifted rather than dragged across the new finish. Appropriate protective coverings should be used where needed, and these should be breathable to prevent trapped moisture. Anyone entering the property should wear clean footwear with soles that will not mark the floor.

Felt pads should be provided and their use encouraged for all furniture, including chairs, tables, and sofas. Rugs should be delayed if the finish manufacturer recommends waiting before placing them on the freshly coated floor. Finally, provide tenants with written care instructions covering appropriate cleaning methods and products to use going forward.

A few simple precautions protect the work you have just completed and extend the time before the next restoration is needed. With clear guidance and a little care, your newly restored floor will stay looking its best for as long as possible.

Information to Send When Requesting a Quote

3575667345634.jpg

To get an accurate, timely quote, provide as much detail as possible upfront. This helps the floor restoration team assess the scope of work and confirm whether the turnaround time is achievable.

  • Property postcode – for access and parking considerations
  • Room sizes – total square metreage for each room
  • Tenancy end date – when the property becomes available
  • Next move-in date – the deadline for completion
  • Photographs – overall condition and close-ups of damage
  • Floor type – solid wood, engineered, parquet, or laminate
  • Known repairs – loose boards, missing sections, rot, or previous issues
  • Furniture – what remains and what needs moving
  • Parking and access – for equipment and materials
  • Other contractors' schedule – to coordinate with other trades

The more information you provide, the quicker and more accurate the response. Most companies can work to a tight schedule if they have the right information in advance.


Frequently Asked Questions

Can wooden floors be sanded in a three-day tenancy gap?

Yes, but only for a screen and recoat or a light sand with water-based lacquer. Full sanding with oil-based finishes typically requires longer drying and curing times. Always confirm with your chosen specialist.

When can furniture be returned after varnishing?

Should decorators work before or after floor sanding?

Can one damaged area be repaired without sanding the entire room?

What happens if moisture is found during inspection?

Can cleaners enter before the finish is fully cured?

A well-planned floor restoration between tenancies protects your investment, improves the property's appeal, and reduces long-term maintenance costs. With the right preparation, timing, and professional support, you can turn a short void period into a valuable opportunity to refresh your rental property.

For a broader strategic approach to maintaining floors across your portfolio, see our related guide: Restoring Wooden Floors in Hyde Park and Woodhouse Rental Properties.

Blog

Others articles