
How to Restore Old Pine Floorboards Without Damaging Them
Old pine floorboards are beautiful, but they are also fragile. Unlike modern hardwoods or even old oak, pine is soft, resinous, and prone to damage from heavy-handed restoration. Yet many homeowners approach pine floors with the same techniques used on hardwood, leaving behind a trail of gouges, burns, and uneven surfaces. The good news is that pine can be restored beautifully. The key is working with its characteristics, not against them. This article explains how to restore old pine floorboards without causing damage that cannot be reversed.
Why Pine Is Different
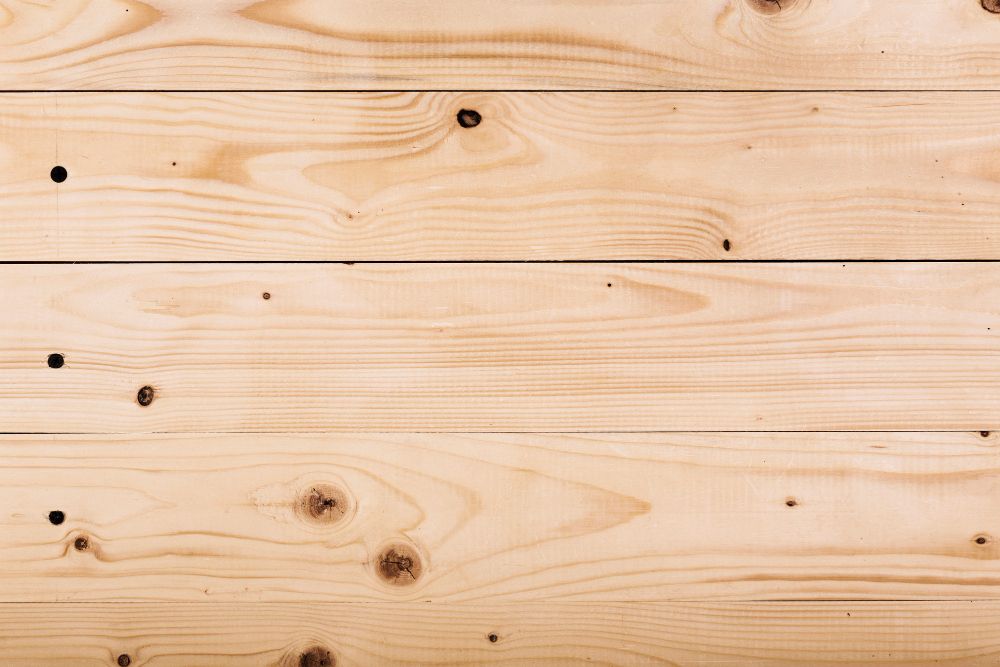
Pine is not oak. It is not maple. It is not any hardwood you might be familiar with. Pine is soft. Very soft. The Janka hardness rating for Eastern white pine is 380, compared to 1,220 for red oak. This means pine compresses under pressure, sands unevenly, and burns easily. It also contains resin that clogs sandpaper and can react with finishes unpredictably.
Old pine is even more delicate. After a century or more of drying, the wood becomes brittle. It cracks more easily. It splinters at the edges. The patina that gives old pine its warm amber colour is thin. Sand too aggressively, and you lose it forever.
Understanding these characteristics is the first step toward safe restoration.
Assessing the Floor Before Starting
 Before touching a sander, assess what you have.
Check thickness. How much wood remains above the tongue and groove? Look at the floor near heating vents or where boards meet fireplaces. If the boards are visibly thin or the tongue is close to the surface, aggressive sanding is not an option.
Identify problem areas. Look for loose boards, raised nail heads, rot, and woodworm damage. Mark these for special attention.
Determine previous sandings. A floor that has been sanded multiple times has less material left. Look for rounded edges on boards, a sign of previous aggressive sanding.
Set realistic expectations. Old pine will never look like new hardwood. It will have gaps, knots, nail holes, and colour variations. These are features, not flaws. Your goal is to refresh and protect, not to create perfection.
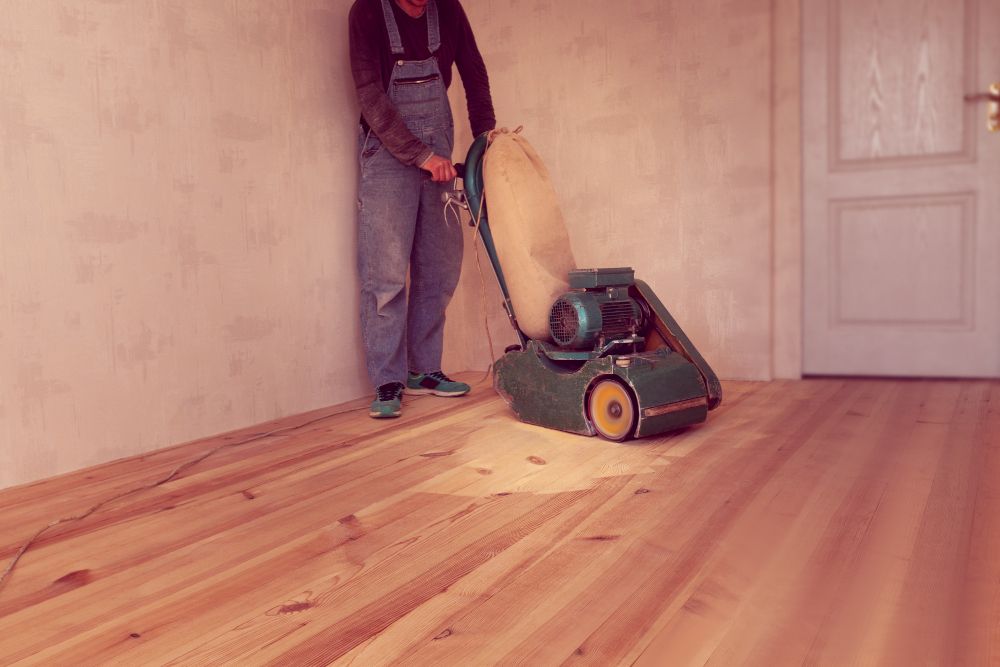
The Safe Sanding Process
Step 1: Punch Every Nail
This is tedious but essential. Walk the entire floor and punch every nail head below the surface using a nail punch and hammer. Missed nails ruin sandpaper, create sparks, and leave visible scratches. On an old pine floor, this can mean punching hundreds or thousands of nails. Do not skip it.
Step 2: Start with Finer Grits
Standard hardwood sanding often starts with 24 or 36 grit paper. On old pine, start with 50 or even 60 grit. Coarse papers remove material too quickly and leave deep scratches that are hard to remove later. You cannot add wood back once it is gone. Start gentle.
Step 3: Use Lighter Equipment
Heavy drum sanders can dig into soft pine, leaving dips and waves. Consider using a belt sander or orbital sander instead. These machines remove material more slowly and offer better control. For large areas, a multi-disc buffer with screens is gentler than a drum sander.
If using a drum sander, keep it moving. Never stop or hesitate. The machine will dig in at the slightest pause.
Step 4: Progress Gradually
 Move through grits slowly: 50, 80, 100, 120. Do not skip grits. Each grit removes the scratches left by the previous one. Skipping leaves visible scratches that show through the finish. Vacuum thoroughly between grit changes to remove dust that could cause scratching.
Step 5: Wet the Grain
Pine has pronounced grain that raises during sanding and again when finish is applied. After the 100-grit pass, lightly mist the floor with water using a spray bottle. Allow it to dry. This raises the grain intentionally. Then make a final light pass with 120 grit to cut off the raised fibres. This extra step produces a smoother final surface.
Step 6: Hand Sand Edges
Use an edge sander for the perimeter, but finish corners by hand. Old pine splinters easily, and machine edging can damage the wood near walls. Hand sanding with a sanding block gives you control in tight spaces.
Dealing with Common Problems
Gaps
Gaps between old pine boards are normal. Do not try to eliminate them completely. For small gaps, leave them. For larger gaps that bother you, use flexible resin filler that moves with seasonal expansion. Rigid fillers crack within months. For the largest gaps, consider inserting timber strips.
Woodworm
Small, scattered holes are usually historic and harmless. Fill them with fine wood dust mixed with a little finish, or leave them as character. Active infestation requires professional treatment. Do not sand over active woodworm—you will spread spores and larvae.
Rot
Soft, dark, crumbly wood indicates rot. Cut out affected sections and replace with reclaimed pine of similar age. Treat the surrounding area and address the moisture source that caused the rot. Sanding over rot just spreads the problem.
Stains
Surface stains often sand out. Deep stains may remain. Oxalic acid (wood bleach) can lighten dark stains but requires careful application. This is a professional task—improper use leaves permanent white patches.
Choosing the Right Finish
- Old pine looks best with finishes that enhance its natural warmth.
- Hard wax oil is often the best choice. It penetrates the wood, provides good protection, allows spot repairs, and leaves a natural matte sheen. It does not look plastic.
- Traditional wax gives the most authentic appearance but requires regular maintenance. It offers less protection against spills.
- Matte lacquer is durable and low-maintenance but looks less authentic. If you choose lacquer, avoid high-gloss finishes. They look wrong on old pine.
- Avoid dark stains. Old pine naturally darkens to a warm amber over time. Dark stains fight this natural beauty and often turn out blotchy due to uneven absorption.
What Not to Do
- Do not use a floor edger aggressively. Edgers remove material quickly and leave visible swirl marks.
- Do not try to make the floor perfectly flat. Old pine floors have natural dips and slopes. Forcing flatness removes too much wood.
- Do not fill every knot and crack. Some imperfections add character.
- Do not use steel wool between coats. Tiny steel fibres embed in the softwood and rust later.
- Do not rush. Pine punishes haste.
When to Call a Professional
Old pine restoration is delicate work. If any of the following apply, consider hiring a specialist:
- The floor has never been sanded before (get it right the first time)
- The boards are visibly thin or damaged
- There is extensive woodworm or rot
- You want to preserve the original patina
- You are unsure about any step of the process
A professional who understands old pine will have the right equipment, the right abrasives, and the patience to do the job carefully. The cost is worth avoiding irreversible damage.
The Reward
A properly restored pine floor is a thing of beauty. It glows with warmth. It carries the marks of its long life—the nail holes, the slight dips, the varied grain. It feels solid underfoot and connects your home to its history. And it will last another century with sensible care.
The secret is restraint. Use lighter equipment. Start with finer grits. Accept imperfections. Work with the wood, not against it. Old pine has earned its character. Your job is simply to help it shine.