

Preparing Your Home for Floor Refinishing: What Needs to Be Done

Refinishing your hardwood floors can dramatically transform your home's appearance, but proper preparation is crucial for achieving professional-quality results. Whether you're hiring professionals or tackling the project yourself, following these essential steps will ensure your floors are properly prepped and your home is protected during the refinishing process.
Clear the Entire Work Area
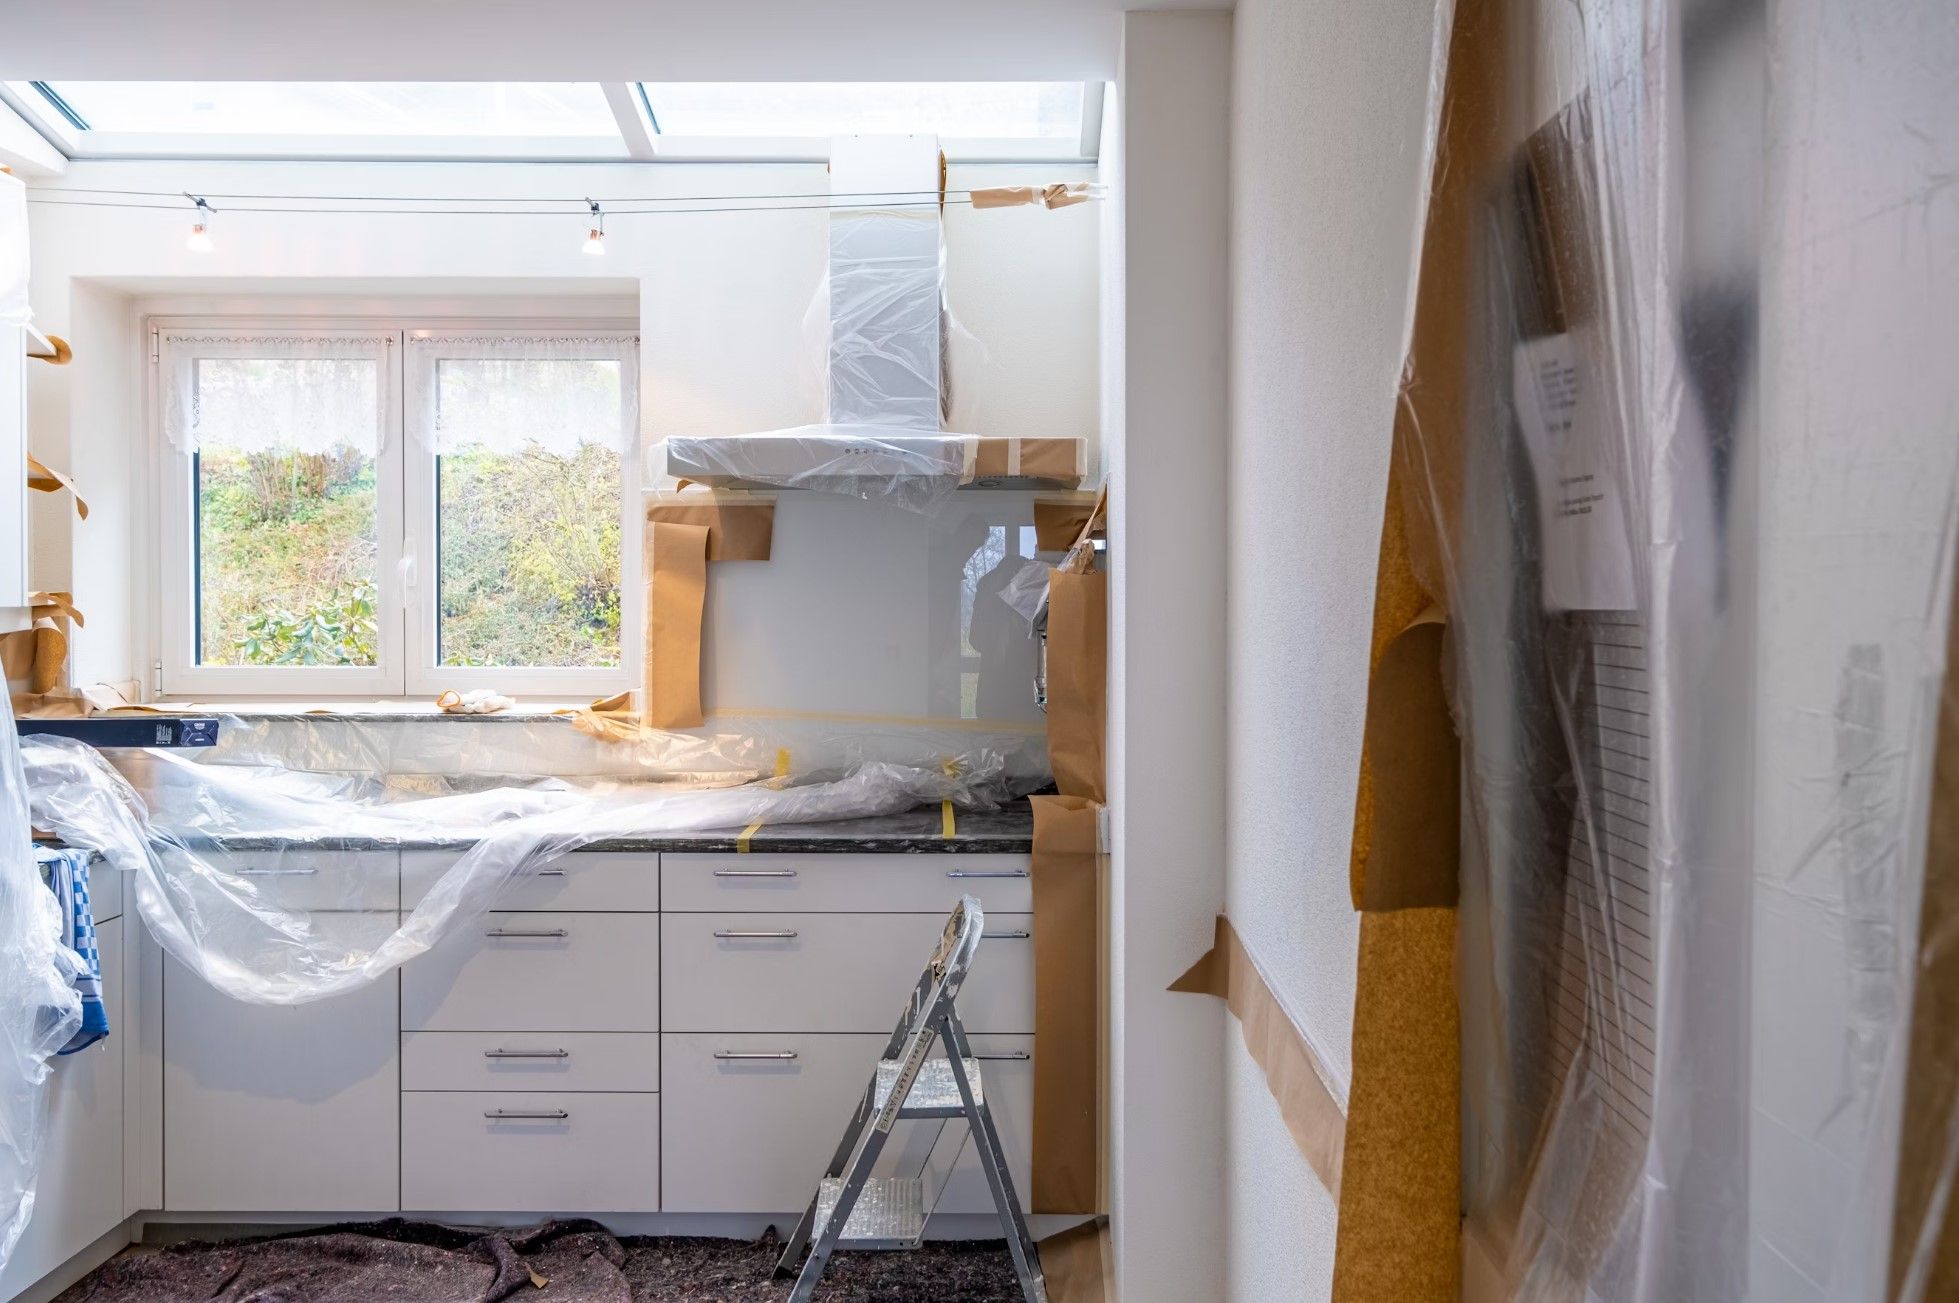
Begin by completely emptying the room of all furniture, rugs, decor items, and wall hangings. Move all furniture to another room or temporary storage, and remove area rugs, carpets, and floor protectors. Take down curtains, drapes, and wall decorations that could collect dust, and clear closets and built-in storage areas. Plan where to relocate furniture beforehand, as you'll need to keep items off the floors for at least 3-5 days during the refinishing and drying process.
Protect Your Belongings from Dust
Floor refinishing generates significant dust, even with modern dust containment systems. Cover furniture in adjacent rooms with plastic sheeting and seal off HVAC vents to prevent dust circulation. Use zip walls or plastic barriers to isolate the work area, and remove or cover delicate electronics and artwork. If anyone in your household has respiratory issues, consider arranging to stay elsewhere during the sanding phase.
Prepare the Floors for Refinishing
Proper floor preparation ensures optimal results. Remove all nails, staples, or tacks from the flooring surface, and hammer down any protruding nail heads to prevent sandpaper damage. Fill large gaps between boards with wood filler, allowing it to dry completely, and clean the floor thoroughly to remove wax, polish, and debris. Any remaining finish or wax will clog sandpaper and create uneven results.
Address Baseboards and Trim
Protect your walls and trim work by carefully removing quarter-round molding if present. Cover baseboards with painter's tape and plastic sheeting, and note any areas needing caulk or touch-up after refinishing. Some professionals prefer to remove baseboards entirely for a cleaner refinishing job.
Plan for Pets and Family Members
Floor refinishing requires careful coordination. Arrange for pets to stay elsewhere during the process and plan alternative sleeping arrangements if refinishing bedrooms. Establish clear pathways to essential areas like bathrooms and kitchens, and prepare for limited access to refinished areas for 24-72 hours. Keep in mind that fresh finishes emit strong fumes, so children and pets should stay away until completely dry.
Create Proper Ventilation
Adequate airflow is essential during the refinishing process. Open windows to allow fumes to dissipate and use fans to circulate air, but avoid blowing dust onto wet finishes. Consider using air purifiers to help remove particulates, but be cautious about creating drafts that might cause dust to settle on wet finishes.
Prepare for the Refinishing Process
Understand what to expect during each phase. The first day typically involves sanding, which is noisy and dusty. The second day includes staining if desired and the first coat of finish. Days three and four usually involve additional finish coats with drying time between each. Most jobs require 2-3 coats of finish, with each coat needing 8-24 hours to dry.
Post-Refinishing Care
After completion, protect your investment by waiting at least 24 hours before walking on floors with socks and 48-72 hours before replacing furniture. Use felt pads under all furniture legs and avoid area rugs for at least 2 weeks to allow complete curing. Regular sweeping and damp mopping will help maintain your refinished floors' beauty.
Final Checklist Before Work Begins
Before starting your floor refinishing project, ensure all furniture and items are removed from the work area and adjacent rooms and belongings are protected. Floors should be cleared of nails and debris and cleaned, with baseboards either protected or removed. Make arrangements for pets and family members if needed, establish a ventilation plan, and create pathways to essential home areas.
Professional flooring specialists emphasize that the difference between a good refinishing job and a great one often comes down to preparation. Taking the time to properly prep your space ensures smoother progress and better results.
By following these comprehensive preparation steps, you'll create ideal conditions for a successful floor refinishing project that transforms your home with beautiful, like-new hardwood floors. For additional information on specific types of finishes or how to choose between staining options, consult with our flooring professionals.