

12 steps to consider when laying laminate flooring
Installing laminate flooring has become a favored choice among homeowners who value an economical, resilient, and visually appealing option for their flooring needs. Unlike traditional hardwood, laminate is adaptable, simple to care for, and scratch-resistant, making it perfect for areas with heavy foot traffic and homes with pets and kids. It offers a range of textures and styles, enabling it to replicate the appearance of various natural materials, delivering both beauty and practicality at a reduced cost.
Before you begin this DIY endeavor, it's essential to grasp the installation process to achieve a seamless fit and excellent results. From preparing the base floor to selecting the appropriate underlayment and laminate panels, every step is crucial. This guide presents twelve key steps that will assist you in preparing, installing, and applying the final touches to your laminate flooring, ensuring a professionally finished look that elevates both the value and comfort of your residence.
Acclimatization of Laminate Flooring After Purchase
Once you've selected your laminate flooring, it’s crucial to let the planks acclimate to the environment where they will be installed. This step is essential because it allows the laminate to adjust to the room’s temperature and humidity levels, minimizing the risk of expansion or contraction post-installation. Leave the flooring in the room for at least 48 hours before starting the installation. During this period, keep the room at a consistent temperature and avoid any significant temperature fluctuations.
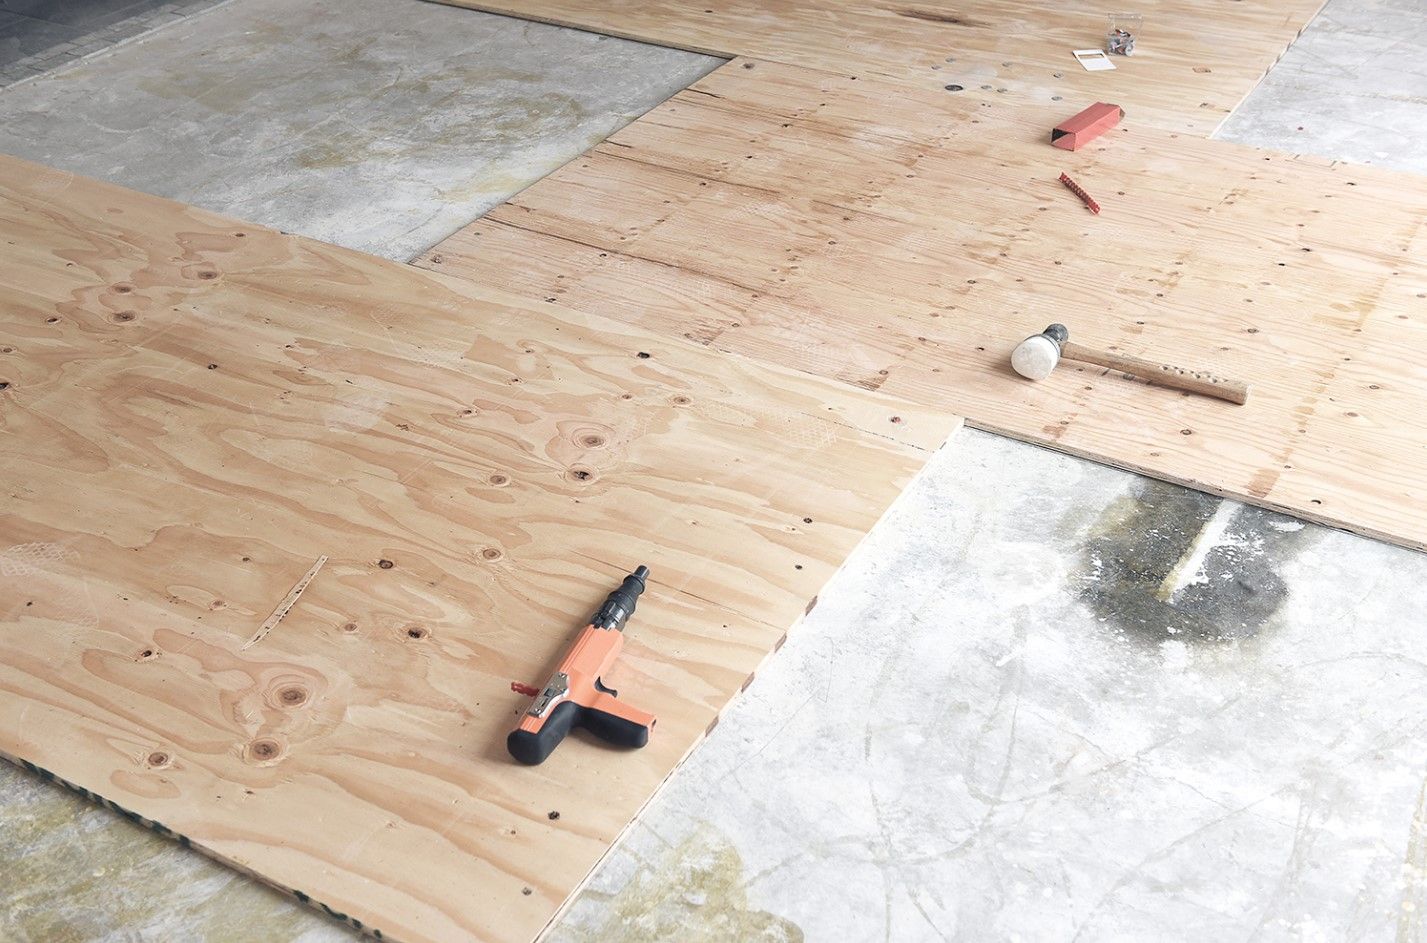
Preparation of the Subfloor
The success of a laminate flooring installation largely depends on the condition of the subfloor. Begin by thoroughly cleaning the subfloor to remove any dust, debris, or residues that could interfere with the laminate's installation. Next, check the entire surface for unevenness using a level or a straight edge. Any dips or peaks greater than 3 mm over a 1-meter span need to be addressed, either by sanding high spots or filling in low spots with a suitable floor leveling compound. Ensuring a flat and stable subfloor helps prevent issues like buckling or gaps in the finished floor.
Laying Vapor Barrier - Underlay
Installing a vapor barrier is a critical step, especially if you're laying flooring over concrete or in moisture-prone areas like basements. A vapor barrier or underlayment will protect the laminate from moisture damage, which can lead to warping or mold growth. Roll out the underlayment according to the manufacturer's instructions, making sure the edges overlap and are sealed with tape to create a continuous protective layer. This also helps reduce noise and adds a slight cushioning effect underfoot while enhancing the comfort and durability of your flooring.
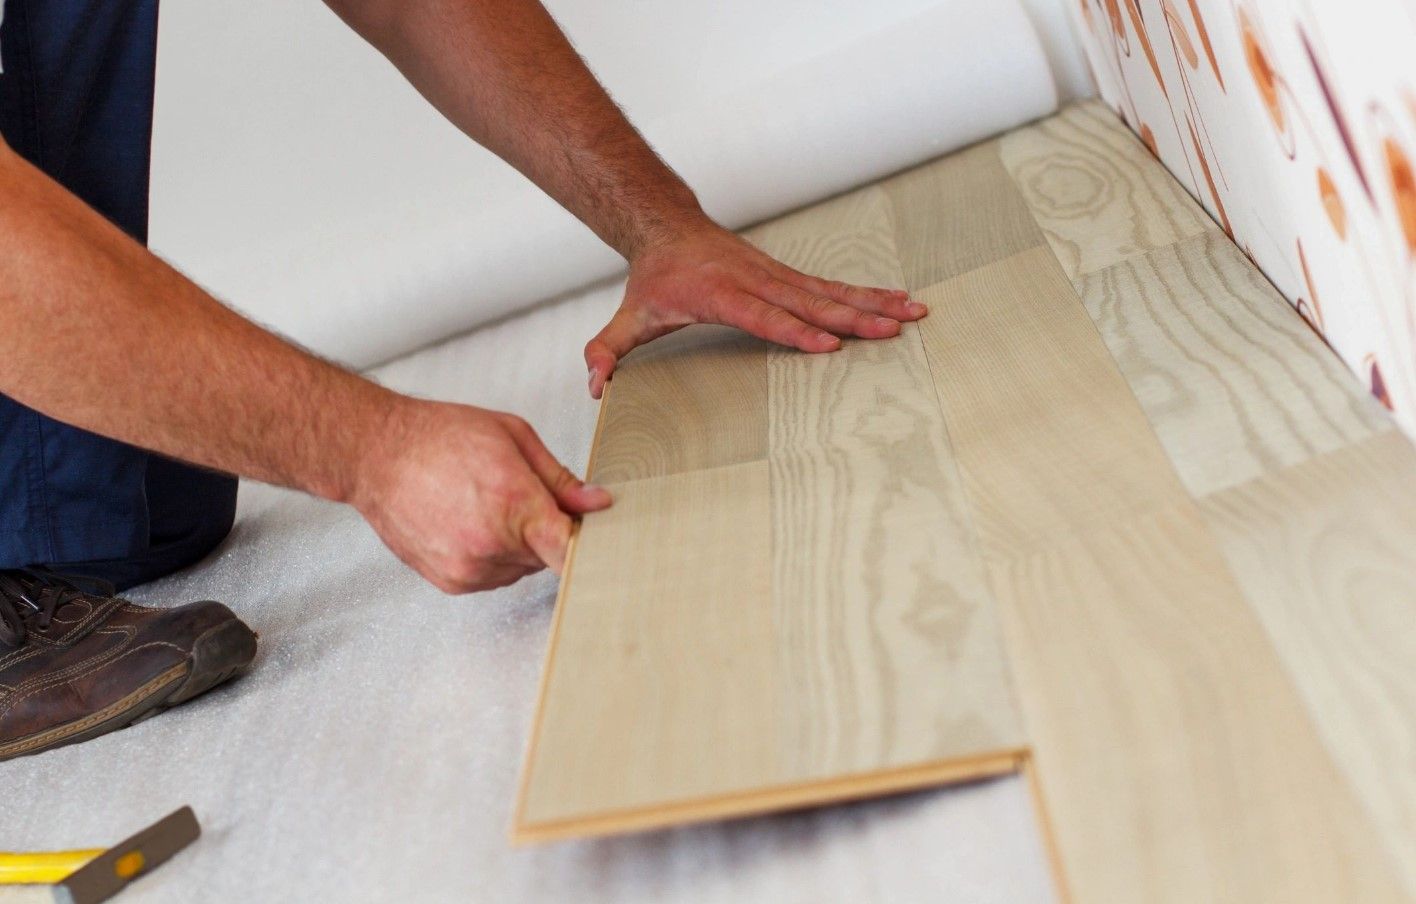
Place Spacers - 10-15 mm from the Walls
To allow for natural expansion and contraction of the laminate flooring, it is vital to maintain a gap between the flooring and the walls. Use spacers to keep a consistent distance of 10-15 mm around the perimeter of the room. This gap will be covered by baseboards or trim after the flooring is installed, so it won’t be visible but is crucial for preventing the laminate from buckling. Ensuring proper spacing also allows for a more forgiving installation process, accommodating any slight deviations in wall straightness.
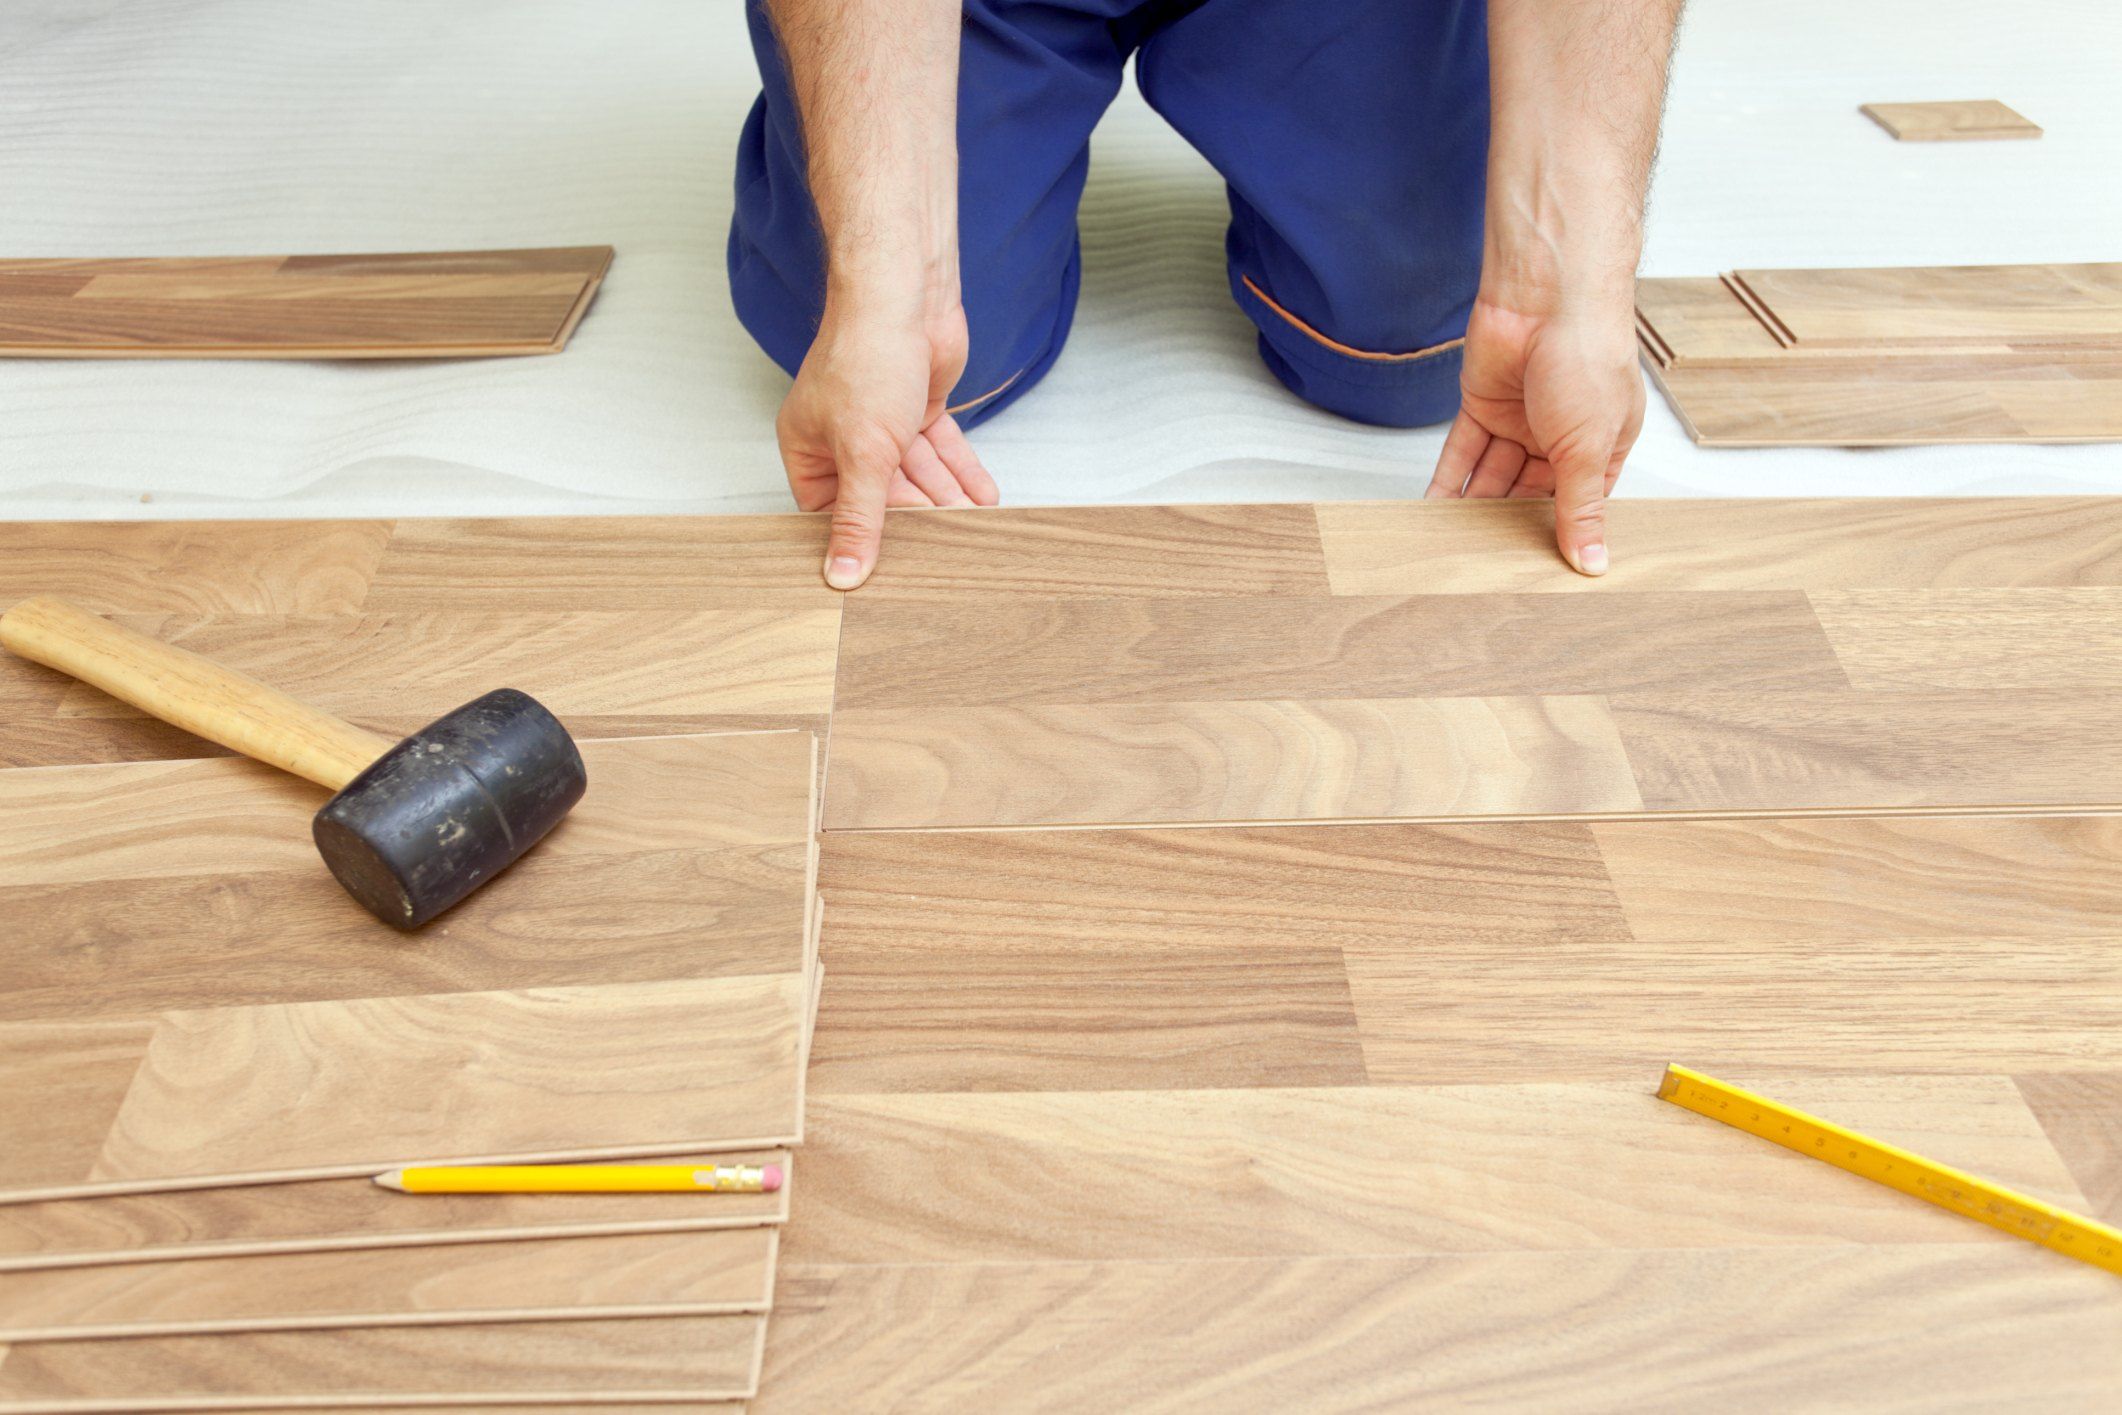
Laying the First Layer
Starting correctly is key to a successful laminate floor installation. Begin laying your laminate flooring from the left corner of the room and move to the right. Ensure the first row is perfectly straight as it will serve as the guide for subsequent rows. Place the planks with the tongue side facing the wall, using your spacers to maintain the necessary expansion gap. Check alignment frequently as you lay this first row, making small adjustments to ensure straightness and proper placement.
Cut Off the Last Laminate Board and Place It as the First Board in the Next Row
When you reach the end of the first row, you'll likely need to cut the last plank to fit. Measure the gap, and subtract the expansion gap from this measurement to determine the cut size for the last plank. A useful rule is to start the next row with the off-cut piece from the previous row to stagger the seams, which adds stability and visual appeal to the flooring. Ensure that the end joints are staggered at least 40 cm from the seams in the previous row. If the off-cut piece is too short (less than 40 cm), then cut a new plank to start the next row to maintain structural integrity.
Snapping
Laminate planks are designed to snap or click together, making installation a relatively easy process. Insert the tongue of one plank at an angle into the groove of the already-laid plank. Gently lower and apply pressure until the plank clicks into place. This locking system creates a tight seal that minimizes gaps and prevents the planks from shifting. It’s crucial to ensure that each plank is securely snapped together to maintain the floor's overall stability and appearance.
Adjustment
As you progress with laying the laminate, it's essential to periodically step back and assess the alignment and layout. Check for any misalignments or gaps and adjust as needed before moving on. Use a pull bar or tapping block to gently tap planks into a tighter fit without damaging the edges. Pay close attention to maintaining the expansion gaps around the perimeter of the room as you add more rows. This ongoing adjustment ensures a smooth, uniform surface throughout the installation process.
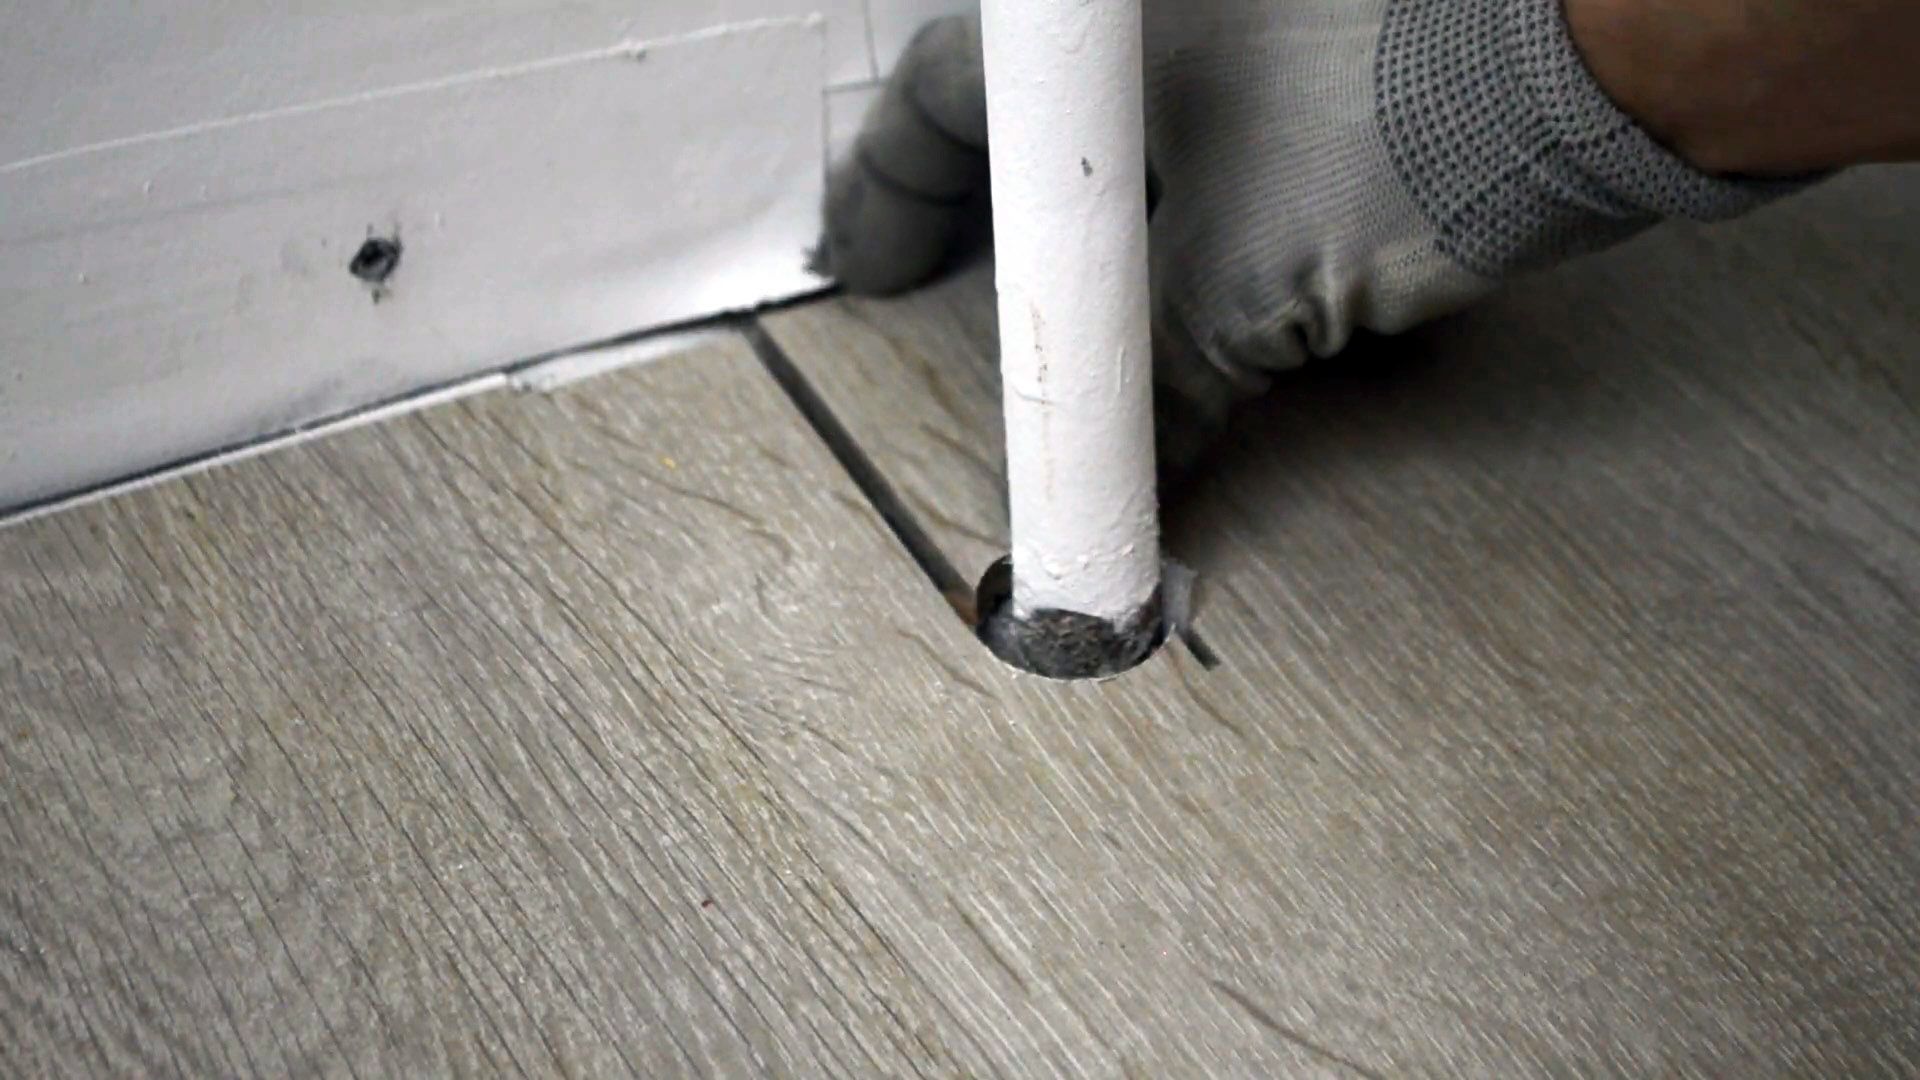
Take Into Account the Heating Pipes and Trim Them
When laying laminate flooring around heating pipes, precision is crucial to ensure a clean finish. Measure the location of the pipes carefully and mark these points on the relevant laminate plank. Use a hole saw attached to a drill to create a neat hole that's slightly larger than the diameter of the pipe to allow for expansion. If the pipe is close to the edge of the plank, you might need to cut a notch instead. Once the plank is properly cut, slide it into place around the pipe, making sure it fits snugly and looks seamless.
Lay the Last Layer
Installing the last row of laminate can be challenging due to limited space and the proximity to the wall. Measure the gap, subtracting the expansion gap, to determine the width of the last planks. Since these planks may need to be trimmed lengthwise, use a table saw or hand saw for precise cuts. Remember to maintain the expansion gap on this final side as well. It may be helpful to use a pull bar to snugly fit the last planks against the previously laid row.
If possible, Trim the Door Frames
Trimming the door frames allows the laminate to slide neatly underneath, creating a continuous, professional appearance across doorways. To do this, lay a piece of underlayment and a laminate plank next to the door frame and use a handsaw flat on top of the plank to cut through the frame at the correct height. This ensures the laminate will fit smoothly under the frame with no visible gaps.
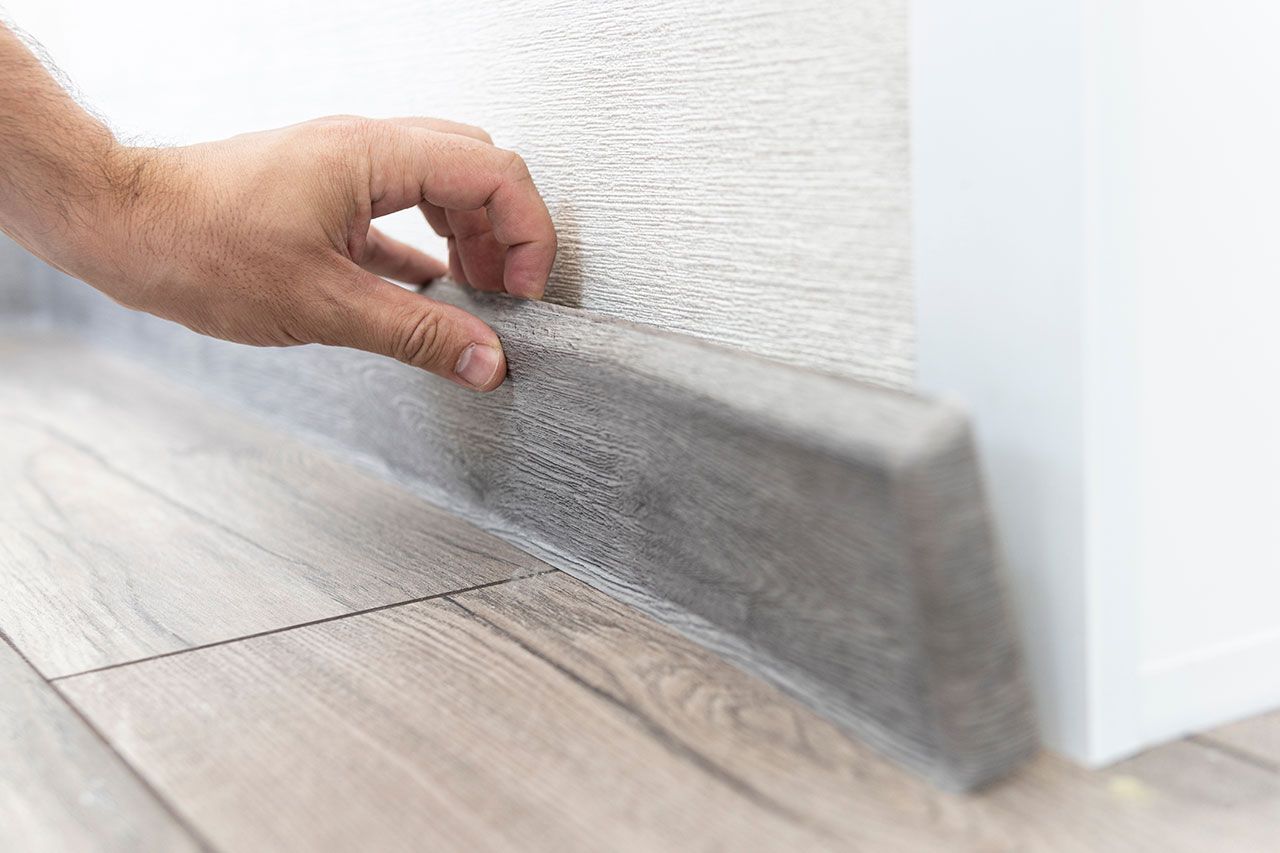
Installing the Skirting Board - Finishing the Job
Once all the laminate is laid, it’s time to install the skirting boards (baseboards). These will cover the expansion gaps around the edges of the room, providing a clean and finished look. Measure and cut the skirting boards to fit each wall. Attach them to the walls, not the floor, with nails or adhesive, ensuring they are flush and secure. This not only enhances the room’s aesthetics but also helps to keep the edge planks firmly in place.
Should You Lay Laminate Flooring Yourself or Should You Trust Professionals?
While laying laminate flooring may seem straightforward, the process can be intricate and requires precision. DIY installations can lead to common mistakes like damaging the locking mechanisms or causing chips in the planks, especially for those without prior experience. These errors can compromise the floor's durability and appearance. Therefore, if you're not confident in your ability to perform the installation flawlessly, it's advisable to hire professionals. They have the tools, skills, and experience to ensure that the job is done right the first time, potentially saving you time and additional costs from correcting mistakes.